


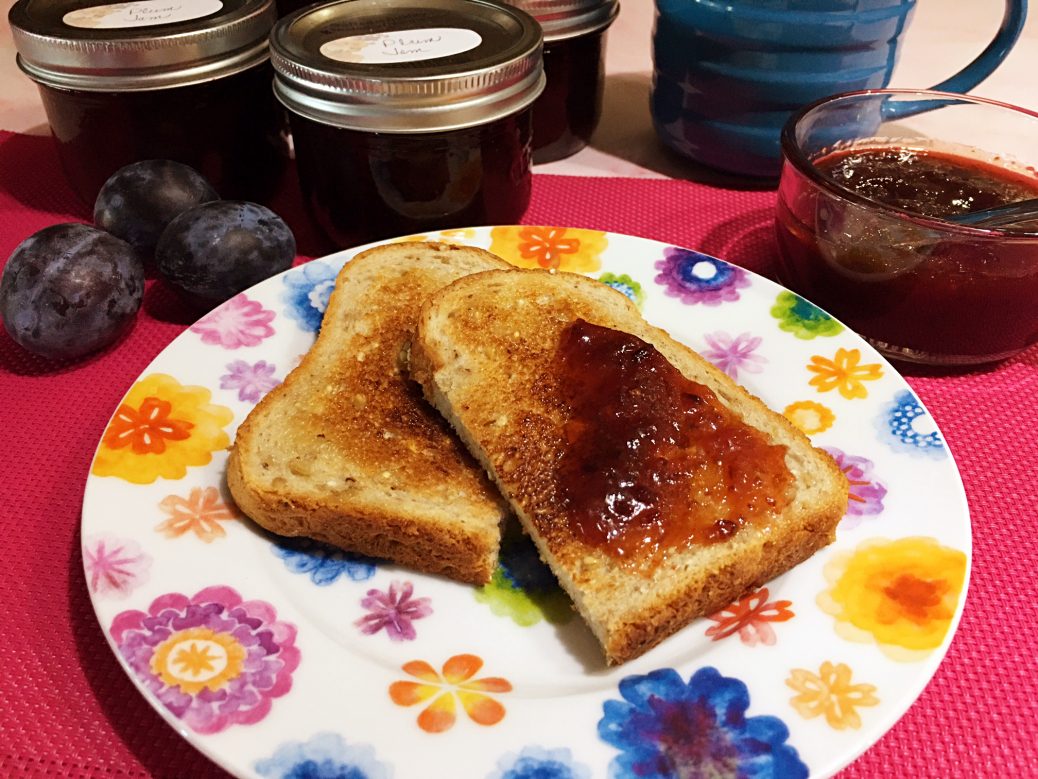
Plum Jam

I love canning and when a certain vegetable or fruit is at its peak, I like to buy a large quantity and preserve them by pickling, making sauces, jams and jellies. When it comes to jam, there are so many flavors that can be made like Raspberry, Strawberry, Apricot, Peach, Black & Blue, Rhubarb, Marmalade, Kiwi, Fig, Grape, and so on.
Another one I really enjoy making is my Plum Jam! This condiment tastes so good! Slightly tart with a nice deep color, this is so delicious when spread on toast or croissants but also as a topping for pancakes and French toast. I also like to add some on my vanilla ice cream… yum! Using exactly the same Fig Newton based recipe, I switch my filling with this jam and it becomes a Plum Newton Cookies.
I enjoy making this Plum Jam for a couple of reasons. First, this easy recipe only uses 3 ingredients… that’s right… pretty simple, right! Second, there’s no added pectin. Certain fruits contain a large amount of pectin such as quince, apples, pears, oranges, and others including plums. By leaving the skin on the plums, its natural pectin will help to set the jam.
After the fruit is macerated with orange juice for 15 minutes, I transfer only a ¼ of the mixture into a large pot and then cover with 1 cup of sugar. I repeat the same step until all the fruit and sugar is in. When there’s a large amount of fruit – there’s about 11 cups of plum pieces for this recipe -, I want to make sure the sugar is well distributed so that’s the reason why I lay out these two ingredients. When it comes to sugar, you might want to adjust it to your liking but also for how sweet your plums are.
In the video, I don’t show you how to do canning because I posted a full episode on it. Make sure to leave about ½-inch of head space and when the water returns to a full boil, process the jars in the water bath for 10 minutes. Transfer them to a wire rack to cool for a good 12 hours before storing them in a cool dark place.
When the damson plums are in season, the first thing I make is this Plum Jam. This recipe makes 8 -250 ml jars enough to last a few months. If you have a few foody friends in your circle, these little guys make great Christmas gifts but that’s only if you don’t eat them all before the Holidays…
Bon Appétit!
Here are more easy canning recipes for you to try…
– Bread & Butter Pickles
– Sweet & Savory Homemade Ketchup
– Dill Pickles
– Mango Chutney
– Spicy Red Pepper Jelly
– Pickled Beets
and for even more breakfast recipe ideas, click on this link… Recipe Category • Breakfast & Brunch
Don’t forget to subscribe to our YouTube channel by clicking on this link… Club Foody YouTube

Plum Jam
Hover to scale
Ingredients
- 4 lbs. damson plums, washed, pitted and quartered
- 1/2 cup orange juice
- 4 cups granulated sugar
Directions
- Place the prepared plums in a large bowl and pour the orange juice over. Stir to coat and let it macerate for 15 minutes.
- In a large pot, add a quarter of the plum mixture and cover it with 1 cup of sugar. Repeat with another ¼ of fruit then cover with another cup of sugar and continue until all the fruit and sugar is in.
- Set the heat to medium and stir very well until the sugar is melted, about 4 to 5 minutes.
- Increase the heat to high and when the mixture just starts to boil and creates some foam on the surface, turn the heat down to medium-low. Simmer gently for 40 minutes, stirring often.
- About half an hour later, using an immersion blender, process until most pieces are chopped leaving some little chunks in it. Scoop up any foam and discard it.
- Do a test by plunging a spoon in the mixture that was sitting in an ice water bowl and then dried off, and scoop up some jam. Let it cool off at room temperature and if it lightly sets up, the jam is ready. Keep in mind that as the jam cools off, it will get thicker.
- Remove from the heat and right away, fill up the sterilized jars, leaving ½-inch head space. Seal and transfer jars into a boiling water bath. Make sure the jars are covered with at least 1 inch of water.
- When the water returns to a full boil, start the timer for 10 minutes.
- Lift jars and transfer them to a wire rack away from any draft to cool completely, about 12 hours. Makes 8 -250 ml jars
Don't forget to rate and comment on this recipe!