


Thumbprint Cookies


I always wanted to have children 👶 but unfortunately, Mother Nature didn’t give me that opportunity. I was pregnant once, miscarried and the doctors discovered that I wasn’t able to have any unless after the second month of pregnancy, I stayed in bed – I’m an Aries, always on the go so that wouldn’t ever happen!
Besides my girlfriends’ children, the only one I had an amazing interaction with was Mackenzie, the daughter of a guy I was dating for a while. We had so much fun together. When her father was working, Mackenzie and I were having our “girls’ night” which was wearing our favorite pajamas, doing our nails then later, having our onion dip for our chips while watching a movie 📺. We went shopping together 🛒, played games, went to restaurants, danced in the living room, etc.
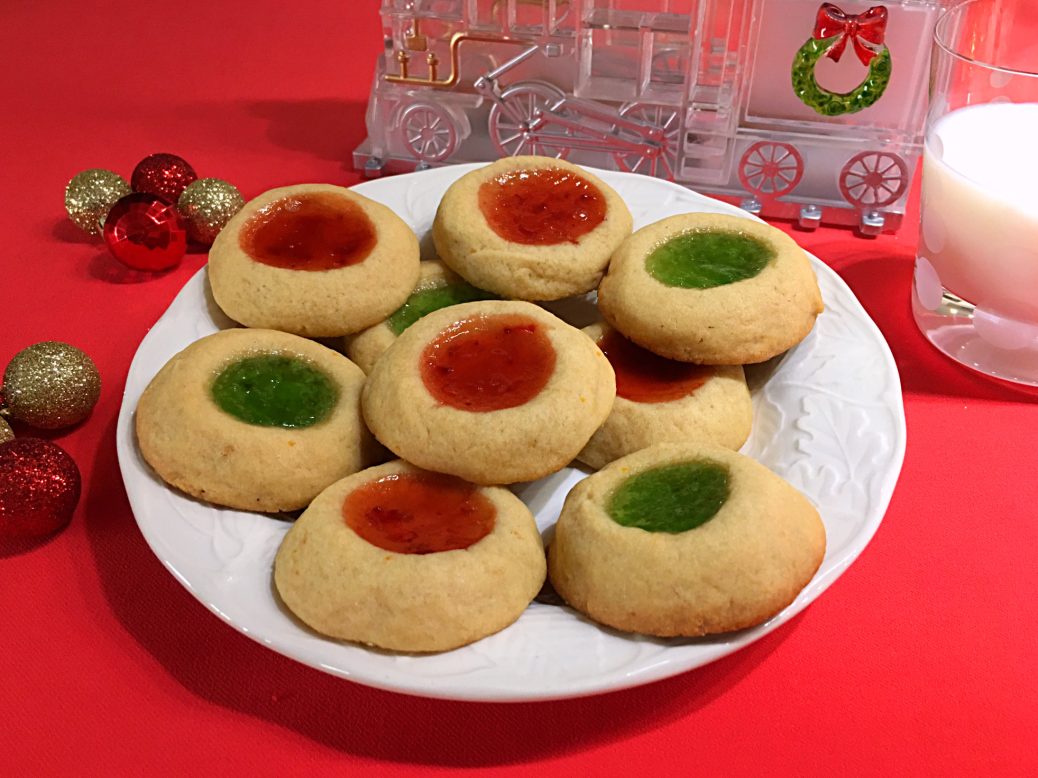
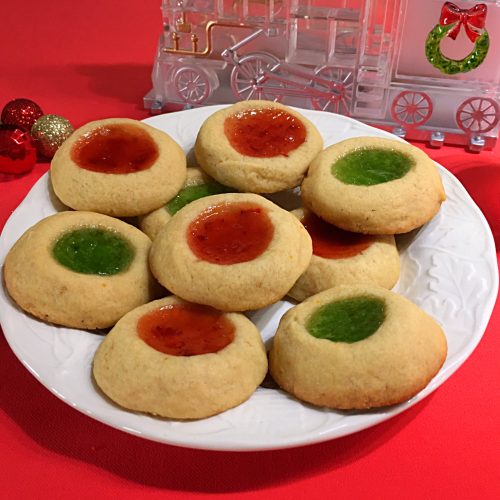
When it came to cooking and baking, we were in the kitchen together trying new recipes. During the Holidays 🎄🎅, one of them was Thumbprint Cookies! After getting the dough recipe from one of my girlfriends, Mackenzie and I had to pick which jams and jellies we would be using. I chose Raspberry Jam while she picked grape jelly 🍇. These were probably the best cookies 🏅 ever because we made them together…
Where do they come from?
Sweden is the country of origin for these festive little treats and they are called Hallongrottor (Hallongrotta in singular). In North America, they are known as Thumbprint Cookies while in Australia, they call them Jam Drops. They are traditionally filled with Raspberry Jam but any other flavors will do like Plum, Strawberry 🍓, blueberry, Apricot, Triple Berry, peach 🍑, Black & Blue, rhubarb, etc. Curds also can be used like Orange 🍊 or Lemon 🍋. Bring them a step further by filling the cavities with Chocolate or with Marmalade.
In the video 📽, I use my Strawberry Jam with Orange Zest as well as my Mint Jelly which gives that festive look. Until a few years ago, I’d never been a fan of the second one because it was too “minty”. What I decided to do was to warm up the jelly to a thin consistency then add some powdered sugar to it until the mixture got sweet enough to be enjoyed as a sweet treat. With this slight alteration, now these are as popular as any other flavored ones.
As the name indicates, the cavities are made by pressing down with your thumb. I have long nails most of the time so the next best thing I use is the back of a very round ½ teaspoon. Knuckles can also be another option but if there are children around, ask them to help… They’ll love participating and tell everyone later on that they made the hole in the middle of the dough with their thumbs.
These easy homemade cookies 🍪 freeze very well. After letting them cool off completely, place them in a single layer in an airtight container and transfer them to the freezer for up to 3 months. When it’s time to thaw them out, let them sit on the counter until they get to room temperature.
Thumbprint Cookies are perfect for the Holidays 🎅🎄🎁! They’re also great to make when there are little ones 👧🧑 around because they can make the little indentations in the center of each cookie using their little thumbs. These Swedish sweet treats should definitely be on your “to do list” this year… they’re fun to make with the family!
Bon Appétit! 🍽
Here are more scrumptious cookie recipes 🍪 for you to try…
– Spicy Gingerbread Cookies
– Lemon Rosemary Madeleines
– Butter Pecan Cookies
– Chocolate Chip Cookies
– Biscotti
– Fig Newtons Cookies
– Powerhouse Cookies
and for even more dessert recipes, click on this link… Recipe Category • Dessert
Don’t forget to subscribe to our YouTube channel 📽 by clicking on this link… Club Foody YouTube
Thumbprint Cookies
Hover to scale
Ingredients
DOUGH
- 2 cups unbleached all-purpose flour
- 1 tsp. baking powder
- 1/2 tsp. ground Himalayan sea salt
- 1 cup (2 sticks) unsalted butter, softened tips & tricks
- 1/3 cup brown sugar, packed
- 1/3 cup granulated sugar
- 1 large free-run egg, room temperature
- 1 tsp. orange zest
- 1 tsp. pure vanilla extract
FILLING
- 1/3 cup jam, jelly or curd of your choice Footnote
Directions
- In a medium bowl, combine flour, baking powder and salt; whisk well and set aside.
- In the bowl of a stand mixer, add butter and sugars. Process until the mixture is creamy using a paddle attachment. Add egg, orange zest and vanilla extract; process until incorporated.
- Add half of the dry ingredients to the butter mixture and mix on low speed until blended. Add the remaining half and process until well incorporated, scraping the sides of the bowl.
- Transfer the bowl to the fridge for 30 minutes and preheat oven to 350ºF/180ºC
- Using a small ice cream scoop, portion the dough into tablespoon-sized balls and roll it tightly until nice and smooth. Place them on a baking sheet lined with parchment paper.
- Transfer to the preheated oven and bake for 13 to 14 minutes or until the edges just start to turn golden.
- Remove from the heat and let the cookies cool for 10 minutes before transferring them to a wire rack to cool completely.
Notes
Don't forget to rate and comment on this recipe!
They are so festive and very delicious. I followed what you said about the mint jelly and the results are perfect! Thank you Frankie for your incredible recipes and Merry Christmas
You’re so welcome and I’m happy you enjoyed the recipe. Without the added sugar, the mint jelly is too… well, “minty”. They’re a fun recipe to have the little ones involved. Merry Christmas to you and your family Bee 🎄 🎅 🎁