


Homemade Pasta

When it comes to food, we all have our weaknesses. Mine is fresh baked bread 🍞, sauces and pasta… okay perhaps I can extend that list but I’ll do it another time!
As I mentioned, pastas are one of them. I find them so versatile because they can be mixed with different types of meat, seafood, vegetables and can be combined with a wide variety of sauces… here’s the sauces again 😏! Might as well add the fact that they can also be served with fresh bread as an accompaniment, lol!
All right, back to pastas…
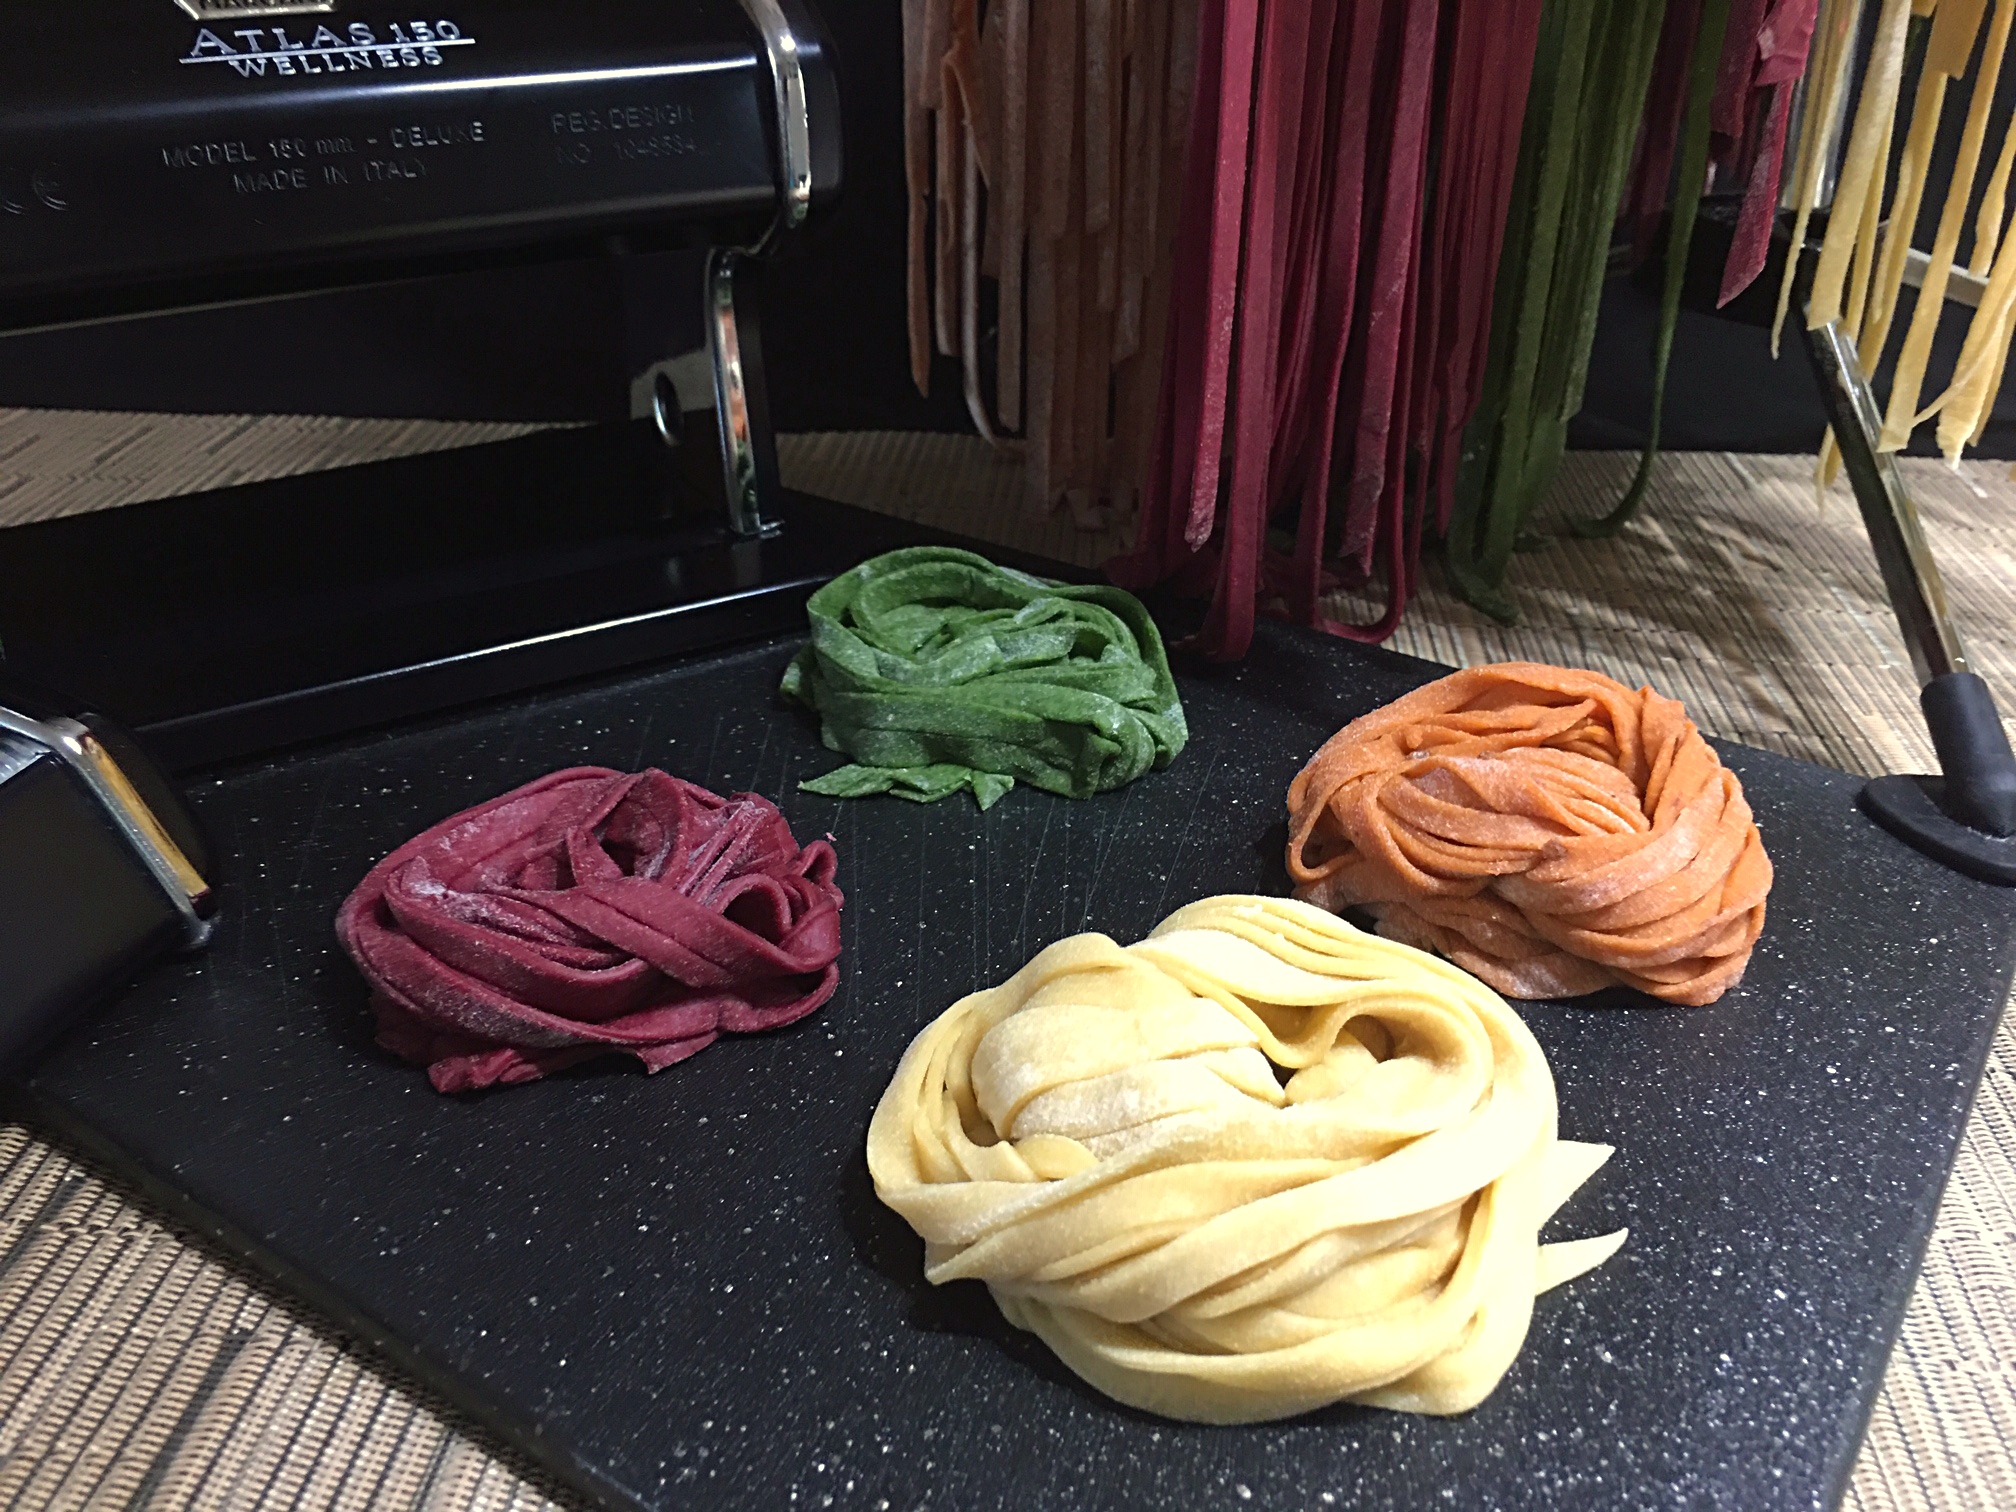
Commercial pastas are readily available but if you consider yourself a foody, then you simply have to make Homemade Pasta! Here are the reasons why you should roll up your sleeves; it’s fresh and tastes far superior to the ones from the store. Surprisingly, it’s very easy to make plus it cooks much quicker. Another bonus is you can add delicious and colorful ingredients to the dough like spinach, carrots 🥕, beets, and many more.
I use either 00 flour or unbleached all-purpose flour… whatever I have on hand. Honestly, both work well as long as you sift them. Some prefer 00 while others don’t see the necessity to buy it 🛒 and use regular flour. Choose the one you like.
Technically, when it comes to measuring flour, weighing it is more accurate. I’ve been making Homemade Pasta for many, many years and I go by cups. As a result, many times I have to add a little bit more water 💦 to moisten my dough otherwise it’s too dry and crumbly.
In the video, I mention chilling the dough for at least a couple of hours ⏰ but I personally prefer 24 hours. I find that letting the dough rest for that extended time is better because it gives the gluten time to relax so the next day, the dough is easier to handle.
Another option is to freeze the dough for later use. The proper way to do this is to form a disk, dust it with flour and wrap it tightly with plastic wrap before placing it in a re-sealable plastic bag. It will keep for up to 4 months 📆. When you take it out from the freezer, place the frozen dough in a bowl leaving it wrapped in the plastic film and keep it at room temperature. It can take a few hours to thaw out completely before you’re able to roll it out and cut it.
Another tip is, before I cut my pasta with the machine, I always dust some flour on the dough. This prevents the pasta 🍝 from sticking together.
The afternoon I was filming, we were having Fettuccine alle Vongole, one of my favorite dishes 💖 from David. When I make this type of pasta, I stop after the #6 setting because I like it thin but stopping at #5 is good too, just a little thicker that’s all.
Bigoli resembles a very thick spaghetti so to achieve it, stop 🛑 at setting #2. Setting #3 is good to make spaghetti chitarra which is similar to tagliolini but thicker. If you’re making egg noodles, scialatielli and lasagna, stop at #4 or 5. When it comes to spaghetti, vermicelli, ravioli or fettuccine, #5 is the perfect setting. At #6 and 7, these settings are good for linguine, lasagnette, pappardelle, tagliatelle, mafaldine and tortellini. If you decide to make very thin pasta like angel hair aka capelli d’angelo or tagliolini, stopping at #8 or 9 is the way to go.
When freshly made, there are three options; either you use them the same day, you dry them on a pasta drying rack (make sure to separate them) or you freeze them 🧊. When drying, if you don’t own one, don’t worry; just place them on the back of a chair or a clothes drying rack.
The freezing option…
When I decide to make 👩🍳 Homemade Pasta, I don’t do a small batch. I usually make several different colors/flavors and shapes. For long shaped pastas, I gather them into little nests and place them on a baking sheet lined with wax paper, spacing them before transferring to the freezer. When they’re solid, I place them in individual re-sealable freezer bags according to the shape, color or portion and then back in the freezer.
With other shaped pastas such as ravioli, lasagna, orecchiette, farfalle, etc., I place them separately on a baking sheet lined with wax paper, transfer to the freezer and wait ⌚ until they get solid, and then place them in re-sealable plastic bags before returning them to the freezer.
If Homemade Pasta is on the menu that night, add the freshly made noodles to a large pot with boiling salted 🧂 water. When the water returns to a boil, cook for 2 to 3 minutes depending on the size and thickness of the pasta. If you froze them, it will take 4 to 5 minutes. If you hang them on the drying rack, it can take anywhere between 4 to 7 minutes depending on the size and thickness.
Making Homemade Pasta is a great way to enjoy it even more! The freshness of these noodles made from scratch will elevate any pasta dish. If your partner or children 👧👱♂️ help you, the process will go faster plus it will be fun to build the anticipation for the “splendido” meal you’ll have together later…
Bon Appétit!🍽
Check out these other fabulous pasta recipes…😀
– Pastitsio
– Baked Ziti
– Pappardelle with Pancetta & Mushrooms
– Creamy Tortellini Boscaiola
– Spaghetti alla Carbonara
– Creamy Shrimp Linguine
– Spicy Sausage Penne all’Arrabbiata
– Meat Lasagna
– Italian Stuffed Pasta Shells
and for even more pasta recipes 🍝, click on this link… Recipe Category • Pasta & Pizza
Don’t forget to subscribe to our YouTube channel 📽 by clicking on this link… Club Foody YouTube
Homemade Pasta
Hover to scale
Ingredients
- 1 1/2 cups flour 00 (substitute unbleached all-purpose flour), sifted
- 2 large free-run eggs
- 1 tbsp. olive oil tips & tricks
- 1/2 tsp. ground Himalayan pink salt
- 1 tbsp. water, or more if needed
Directions
- On a clean work surface, add flour and form a well. Add eggs, oil and salt in the center of it. Slowly incorporate the flour while beating the egg mixture.
- When mostly mixed, gather the ingredients together by hand and start forming a ball. Knead the dough for 5 minutes and if it’s dry and crumbly, add a little bit of water until smooth.
- Form a disc and wrap it tightly in plastic film before transferring it to the fridge for a couple of hours or up to 24 hours.
- Flour the work surface before adding the chilled dough; lightly sprinkle the dough with flour.
- Using a rolling pin, flatten it out to an oval shape long and wide enough to fold it like an envelope, taking one side and folding it over halfway and then doing the same with the other side. Sprinkle on more flour and roll it down to a thickness of about 3/8-inch.
- Set the pasta machine to the widest setting (0) and feed the dough through the rollers. Cut the dough length in half and fold each half into an envelope shape; sprinkle lightly with flour.
- Run it through the machine 3 more times. After the 4th time, change the setting to 1 and run it through once.
- Change the setting to 2 and run it through once again. Continue doing this with each higher setting until you get to the desired thickness.
- Cut the pasta in half and dust the pieces on both sides with flour, spreading evenly.
- Feed each piece of dough through the cutters on the pasta machine. Place them on a pasta drying rack, separating the noodles or use them right away.
Don't forget to rate and comment on this recipe!
This is our traditional dish on New Year’s Eve. This time, we’re planning to make it with spinach. Happy 2026, Chef Frankie!
That’s awesome, Brett 😉! Thank you and I wish you a wonderful 2026 🥳!
Thank you Frankie for posting this recipe. I made it a few times and love it!
It’s my pleasure, Tina 😀. I’m happy you enjoy making pasta from scratch… so much better than any commercial brands. Enjoy the rest of your day.
Very nice. Yummy
Thank you 😊. It’s a very easy recipe to make and will elevate any pasta dish. Have a nice day, Dipshikhar 🌞
My Friend love this is so very easy to do 😊 thank you for sharing💜
You’re welcome, Sandra 😉. It’s quite easy, plus fresh and very tasty… definitely a must try! Enjoy your weekend.
How did you make your carrot pasta? Just curious…
You boil them in salted water until very tender, drain, and transfer to a food processor or a blender. Purée them until totally smooth and add about 1/3 cup to the doughbefore kneading. Continue with the recipe.
Good evening Frankie, thank you very much for easy homemade pasta recipe👍👍👍❤️
My pleasure, Kim 😊. You’re right, it’s very easy to make homemade pasta and it tastes so amazing. Have a lovely day 🌞.
Buon lavoro!
I love the way you’re explaining it. Thank you.
You’re welcome, CK 😀.