


Grandma’s Crunchie Bars


Grandmas, Nonnas or Omas 👵 have always been important figures in families. They’re the ones who bring the family together. They are the peacemakers, the matriarchs, the storytellers and of course the amazing cooks! My grandma could cook almost anything from scratch and it was always delicious!
Every time we went to visit my grandma in Québec City, I was so excited! I couldn’t wait to see her beautiful, warm smile and jump into her arms. To me, she was “home”, a place where I felt safe and loved 🥰.
Of course it was only a matter of minutes before she was carrying me to the kitchen and asking me if I was hungry or wanted a treat. It didn’t matter if we had just finished eating before visiting her, she always placed some food 🥧 on the table. “No Thank you” wasn’t something she could understand easily. If our stay was for a few hours, she would ask us at least 10 times if we wanted something to eat or wanted to try this or that.
Back then, women were making most everything at home 🏡. They didn’t have big grocery stores around the corner and also lots of them were living in rural areas so going to the city was only for necessities. People were pretty much self-sufficient especially when it came to food.
My grandmother was privileged to receive a very good education at a private school. She learned from the “Nuns” there what a young girl from society should learn and one thing was obviously cooking. Not just because she was my grandma but wow 🤯 did she ever know how to cook. I wish we had lived closer together so I could have visited her more often and learned even more from her.
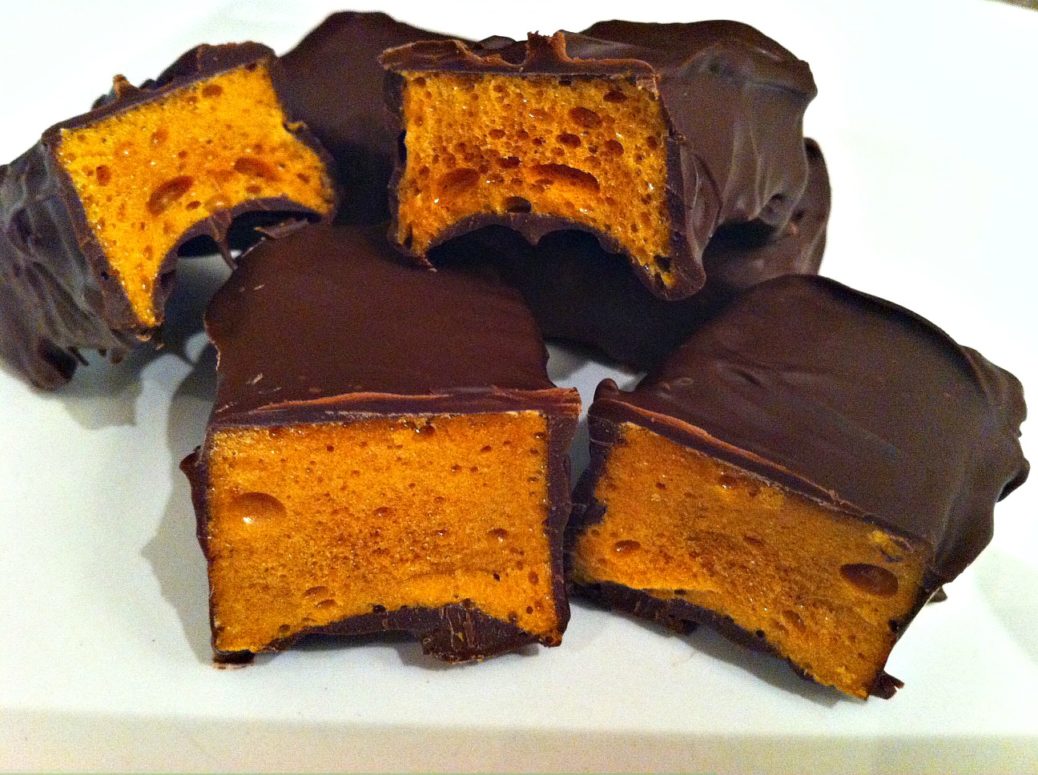
What I am about to share with you is her “toffee” chocolate bars that I like to call my Grandma’s Crunchie Bars. I put toffee in quotes because that is what she used to call them. Commercially, these are called Crunchie Bars.
This treat is not really hard to make but slightly technical. Do you remember in your chemistry class 🧬🧪 how baking soda can react with other ingredients? That’s right, it expands a lot so you need a big pot! Also, after mixing it, quickly transfer the toffee mixture into molds as it will start hardening.
After 6 hours ⏰, the next step is to dip the hardened toffee pieces into melted chocolate and coat them entirely. You can use a couple forks, a spoon or simply your fingers… whichever suits you the best! When they’re done, transfer to the fridge for 1 hour before enjoying these Grandma’s Crunchie Bars!
After you make these crunchie bars, you won’t believe how close they are to the ones you can buy from the store 🛒. Honestly, I’d rather make my own rather than buying them because I know what goes into the recipe. I sure don’t need all the extra preservatives. If you want to be the star of your neighborhood during Halloween 🎃, you’ve got to try MY Grandma’s Crunchie Bars…
Bon Appétit!🍽
Here are more yummy snack recipes for you to enjoy…😀
– Funnel Cakes
– Grandma’s Peanut Brittle
– Dulce de Leche Turtles
– Energy Berry Bites
– Spicy Holiday Chocolate Bark
– Blood Orange Ice Cream
– Sesame Snaps
– Puffed Wheat Squares
– Bounty Chocolate Bites
and for even more delicious snack recipes 🍭, click on this link… Recipe Category • Snacks
Don’t forget to subscribe to our YouTube channel 📽 by clicking on this link… Club Foody YouTube
Grandma's Crunchie Bars
Hover to scale
Ingredients
- butter, as needed for silicone mold tips & tricks
- 3/4 cup granulated sugar
- 2 tbsp. light corn syrup see Recipe
- 2 tbsp. honey tips & tricks
- 1 tbsp. water
- 1 tsp. pure vanilla extract
- 1 tbsp. baking soda
- 2/3 cup milk or semi-sweet chocolate, melted
Directions
- Lightly grease a rectangular silicon mold with butter; set aside.
- In a large pot, add sugar, corn syrup and honey. Turn the heat to medium-low and cook until the sugar starts to dissolve, stirring constantly. When the mixture gets very sticky, add water; stir until smooth.
- Bring the mixture to a boil. Reduce the heat to medium and simmer, stirring often. Cook until it reaches 275ºF to 300ºF.
- Remove from the heat and add vanilla extract as well as baking soda; stir immediately. The mixture will expand while stirring; that's why it's important to use a large pot from the beginning.
- Quickly transfer the mixture into the prepared silicon mold (don’t even it out otherwise the air bubbles will be removed) and let it sit until it hardens, about 7:30 hours.
- Unmold the bars and dip each in melted chocolate, coating well. Transfer them onto a wire rack sitting on a baking sheet lined with wax paper to catch any drips.
- When they are all coated, transfer them to the refrigerator until the chocolate bars get hard, about 1 hour.
Notes
Don't forget to rate and comment on this recipe!
Last time I bought some, the chocolate was discolored, yuk! I found your recipe and made it. Delicious!! That’s it! I’ll never buy them again. Thank you for sharing your grandma’s recipe.
It’s my pleasure 😉
These look like crunchie bars from store. Unfotunately don’t have the silicone mold but I will try to score with knife. maybe smaller squares for gifts or on a sweet tray on holidays.
I made sponge toffee years ago but couldn’t find recipe so thanks for sharing your grandma’s recipe
made with love.
👵🍯🍫😙
You’re so welcome 😀! These little guys are always a hit! Have a fabulous day Lori 🌞
These look delicious!
Thank you 😊! They really are delicious! They taste better than the ones from the store. Have a wonderful day Mary 🌞!
OMG
I can’t believe it !!!
that tonight on Christmas morning at 3:56 I am 62 years old I cannot sleep I find in my cupboard my favourite chocolate to much on Crunchy remembering my child years years attempting to make this I came very close to the same recipe without chocolate I was ten years old very delicious and satisfying
The good old days.
Good morning Monica ☀. That’s awesome! Thanks so much for sharing. Merry Christmas & Happy New Year 🎄 🎅 🎁