


English Muffins

Ask me what my ultimate weakness is and I’ll tell you it’s bread 🍞🥖… okay, maybe a couple others but bread is definitely among them! The smell of freshly baked bread simply triggers my appetite. When making it at home, it’s even worse because it’s so fresh!
In the morning, there is a wide variety to choose from like Banana Bread, Croissant 🥐, Brioche, Monkey Bread, Zucchini Bread, Pain au Chocolat, Bagel, Apple Cinnamon Bread, and the list goes on! Another one that is quite popular for breakfast and brunch is English Muffins!
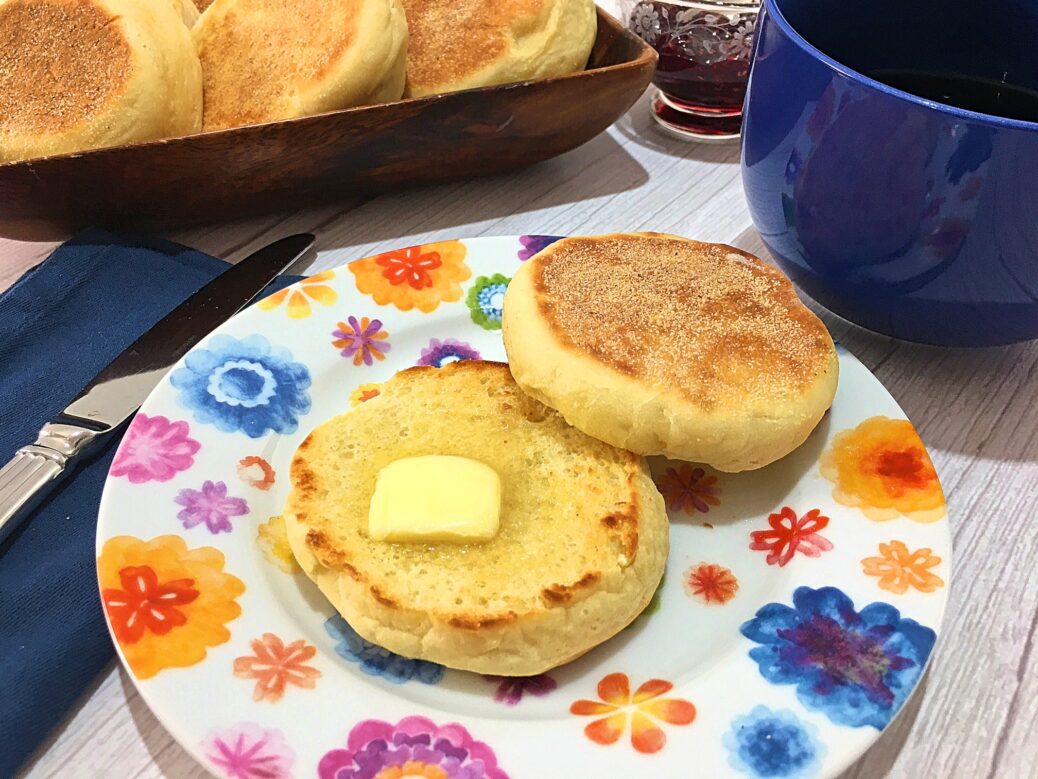
These little guys are delicious and fabulous when making them from scratch! While the store-bought ones are heavy and dense, these homemade ones are light, fluffy and incredibly tasty 😋! Their texture is soft and slightly chewy plus they’re easy to make with amazing results!
You don’t need a degree 🎓 from Le Cordon Blue or the Institute of Culinary Education (ICE) to make these incredible breakfast delights! What you need is time and a cookie cutter… that’s all! I say “time” because to achieve great flavor and texture, it’s ideal to let the dough rest in the fridge for at least 8 hours but preferably overnight.
When making the dough, it will become pretty sticky and that is exactly what it’s supposed to be. The perfect kitchen tool for the task is a stand mixer as it will be hard to handle. Contrary to other bread recipes, English Muffins are “special” and the paddle attachment is used instead of the dough hook.
When mixing flour and salt 🧂, there’s no need to sift but whisking the two ingredients for a minute or two will give a lighter outcome. For this application, I like using unbleached all-purpose flour. It gives a light chewiness to these little guys. If using bread flour, the texture will be chewier.
After rising in a very well-oiled bowl for a couple of hours or until it doubles in size, the bowl is covered with plastic wrap and the dough is transferred to the fridge. During that time, it will puff up and the flavor will develop as well. Here’s what happened when filming 🎥 this featured recipe…
I had an insane schedule and although I’ve been making them for years, I had no energy to proceed with the recipe the next day. I took a chance and left the covered dough in the fridge for an extra day. Two days later, I continued filming, hoping 🤞 the recipe wasn’t ruined. To my surprise, they were astonishingly tasty and not dry at all!
When taking the dough out (a day or two later) and dropping it onto a well-floured work surface, it’s important to gently spread it out with floured hands down to ½-inch thick. The dough will retract therefore let the gluten relax for a couple minutes ⏳ before going back at it. It’s not recommended to use a rolling pin because it will knock the air out.
Although semolina can be used, the true signature of these muffins is cornmeal. I sprinkle a large baking sheet lined with a silicone mat or parchment paper with cornmeal and spread it out evenly. After cutting my dough with a 3-inch cookie cutter, each round is transferred to the prepared baking sheet, sprinkle the tops with more cornmeal, cover with a clean dish towel and proof for 30 minutes ⏰.
The best way to cook 👩🍳👨🍳 these little guys is either in a cast-iron pan or a griddle. Make sure the pan (or griddle) is very hot before starting. Sprinkle more cornmeal, place 3 or 4 muffins, cover with a lid and reduce the heat to medium-low. It should take about 8 to 10 minutes before getting that gorgeous golden-brown color. Flip and cook until the internal temperature reaches 200ºF.
While cooling off on a wire rack, do another batch. You can push away the “used” cornmeal on the side but I prefer getting rid of it so it doesn’t burn and trigger my fire alarm 🔥 (it’s very finicky). I repeat the same process, working in batches; lightly sprinkle in some cornmeal, place 3 to 4 muffins, cover and cook.
Baked muffins can be stored in an airtight container for up to 4 days. They also freeze very well for up to 2 months. What I do is to wrap them individually with wax paper and place them in a large re-sealable plastic bag or container. When it’s time to serve, I thaw what I need either on the counter or in the microwave.
These homemade English Muffins are outstanding! Fluffier, lighter and tastier than the ones from the store, these staple breakfast items should be on your “to do” list. With their “nooks and crannies”, these airy little rounds are perfect to spread with butter, jam, honey 🍯 or use them for eggs benny, breakfast egg sandwiches, and so on…
Bon Appétit! 🍽
Here are more delicious bread recipes for you to try… 😀
– Artisan Bread
– Pumpkin Chai Bread
– Pull-Apart Garlic Bread
– Challah
– Ooey-Gooey Cinnamon Buns
– Scones
– Pineapple Banana Bread with Coconut & Macadamia
– Jalapeño Cheese Bagels
– Saffron Buns
and for even more bread recipes 🍞🥐🥯, click on this link… Recipe Category • Bread & More
Don’t forget to subscribe to our YouTube channel 📽 by clicking on this link… Club Foody YouTube

English Muffins
Hover to scale
Ingredients
- 2 1/4 tsp. active dry yeast
- 1 1/4 cups lukewarm milk (between 105º to 110ºF)
- 2 tbsp. honey tips & tricks
- 2 3/4 cups unbleached all-purpose flour, plus more for work surface
- 1 tsp. ground Himalayan pink salt
- 3 tbsp. melted butter, room temperature
- 1 large free-range egg, room temperature
- canola oil (substitute grapeseed oil), as needed
- 1/3 cup cornmeal (substitute semolina), or as needed
Directions
- In the bowl of a stand mixer, add yeast, milk, and honey. Stir and let it proof for 7 to 8 minutes or until the mixture is foamy and bubbly.
- Meanwhile, combine flour and salt. Whisk well and set aside.
- Add melted butter and egg to the yeast mixture. Using the paddle attachment, process on medium speed until well combined, about 1 minute.
- Add dry ingredients and process on low speed until just combined before increasing to medium speed. Mix for 7 minutes, scraping the sides and bottom of the bowl as needed.
- Transfer the dough to a bowl that has been generously oiled, cover and let it rise in a draft-free area until it doubles in size, about 2 hours.
- Cover the bowl with plastic wrap and transfer to the fridge for 8 to 18 hours.
- Later or the next day, line a large baking sheet with either a silicon mat or parchment paper. Evenly sprinkle on cornmeal and set aside.
- Remove the dough from the fridge and drop it onto a well-floured work surface.
- With floured hands, spread dough out and down to about ½-inch thick. Using a 3-inch round cutter, dip it in flour and cut dough into rounds. Place them onto prepared baking sheets. Repeat until there’s 12 muffins.
- Sprinkle the top with cornmeal and cover with a clean dish towel. Let it proof for 30 minutes.
- While proofing, heat up a large skillet or cast iron (griddle is another option) on medium heat.
- When pan is heated and proofing is done, sprinkle lightly with cornmeal and, working in batches, place 3 to 4 muffins, leaving about 2-inches in between. Cover with a lid and cook for 8 to 10 minutes or until golden brown.
- Flip them, cover and cook for 7 minutes or until golden and the internal temperature reaches 200ºF.
- Transfer muffins to a wire rack to cool completely.
- Discard cooked cornmeal from the pan and lightly sprinkle in fresh. Cook the remaining ones by batches, repeating the same steps.
Don't forget to rate and comment on this recipe!
Thanks for this. English food gets a bad wrap most of the time and I should know growing up in England the 1970’s! But these are lovely. I have mine with a large knob of butter and a slice of extra mature cheddar cheese. I also use the cutters you use as pan-rings for crumpets. Have you made crumpets? Thanks. Aidan.
You’re very welcome 😉! Yes, English cuisine wasn’t a favorite but thanks to technology and letting people discover its delicious food! Yes, I made crumpets before and I should post the recipe one day! Have a lovely day Aidan 🌞
Amazing recipe! I made these this morning and they came out so perfect. Thanks Francine.
You’re very welcome Nora 😉
Made them from BiggerBolder and they were a total flop! I tried yours and was blown away by how perfect they came out. This recipe is a keeper.
So sorry to hear. I’m happy you enjoyed the recipe 😀
I’m a new subscriber to your website and really enjoy your recipes. I made them last night and this morning, they were still very fresh. Regards, Edgar
Welcome to the Club Edgar 😀. They stay fresh for a few days, if they last that long, lol 😅! Have a fantastic day
Quite easy! Thanks chef for posting.
It’s my pleasure. Have a beautiful day Cheryl 🌞
Hello from Mexico. Those English muffins look so perfect!!!!
Thank you 😊 They’re very easy to make.
I’m not a bread maker but I tried this recipe. It’s insanely delicious better than anything else at the grocery store. Thanks Frankie
You’re so welcome 😀! I’m so happy you enjoyed the recipe! That’s exactly what my husband says… Have a wonderful day BobS🌞
Twice I made these. Last time, I decided to add raisins and cinnamon. It was insanely scrumptious! Love your style! Thank you Frankie
You’re very kind, thank you Stephanie 🙏. This recipe is just a base. I like adding ingredients to them. Oh yum! This is a great combination. Have a beautiful day 🌞
I’ve never made English muffins before and was nervous. After carefully watching the video, I rolled up my sleeves and made them. These are beyond YUM! They’re crispy, tender and so flavorful. A big “Thank You”
Making bread 🍞 can be intimidating but in fact, it’s so easy. I’m happy you loved them. Aww, it’s my pleasure, Jane 😀
They came out PERFECTO!!!
Lol 😅, glad to hear!
Came out great!
Thank you for sharing this recipe
It’s my pleasure KK
I made your muffins today and I am so impressed. I will make these from now until forever.
I’m so happy you loved them! They’re so easy to make 👩🍳👨🍳. Aww, you’re sweet! Have a lovely day Princess 🌞
These are 💯 times better than traditional store muffins. Thank you.
You’re welcome Monica. My husband says the same thing 😉
Can I add some cheese?
Of course 😀! This is just a basic recipe. Other ingredients that can be added such as raisins, blueberries, cranberries, etc.
WOW 😍 Homemade English muffins! It doesn’t look complicated I might try to make them this weekend. Thank you chef Frankie
You are so welcome Bee 😀! You’re right, they’re not complicated plus the results are 100% better than the ones from the store 🛒. If you need help, you can always contact me 📞 via the contact form on the website located at the bottom of each page. Enjoy your day 🌞
I made them yesterday and they were amazing! the BEST english muffins EVER! WOW 😍 thank you so much chef Frankie for all your recipes. You make us better home cooks 💗
Awww, you’re so sweet, thank you Bee 🙏 Are they fabulous or what? I have to make another batch again, lol. Have a wonderful day