


Creamy Cheesecake


When we have family and friends over, I can’t imagine not serving at least a 3 course menu – it’s a full experience. I need an appetizer, obviously a main course, and a dessert… the final delicious touch to a meal! It doesn’t matter how perfect the appetizer and main course were, they will certainly remember the dessert so it has to be good 😉.
I have a list of baking favorites 💖 under my belt like Profiteroles, Black Forest Cake, Trifle, Tiramisu, Boston Cream Pie, Lava Cake, Clafoutis, Bûche de Noël (Yule Log), Pavlova, Baked Alaska, Key Lime Pie, Red Velvet Cake, Cranberry Orange Bundt Cake, Baklava, Mille-feuille, Strawberry Shortcake, Sticky Toffee Pudding, Charlotte, Crème Brûlée, Opera Cake, Fruit Cake, and the list goes on and on.
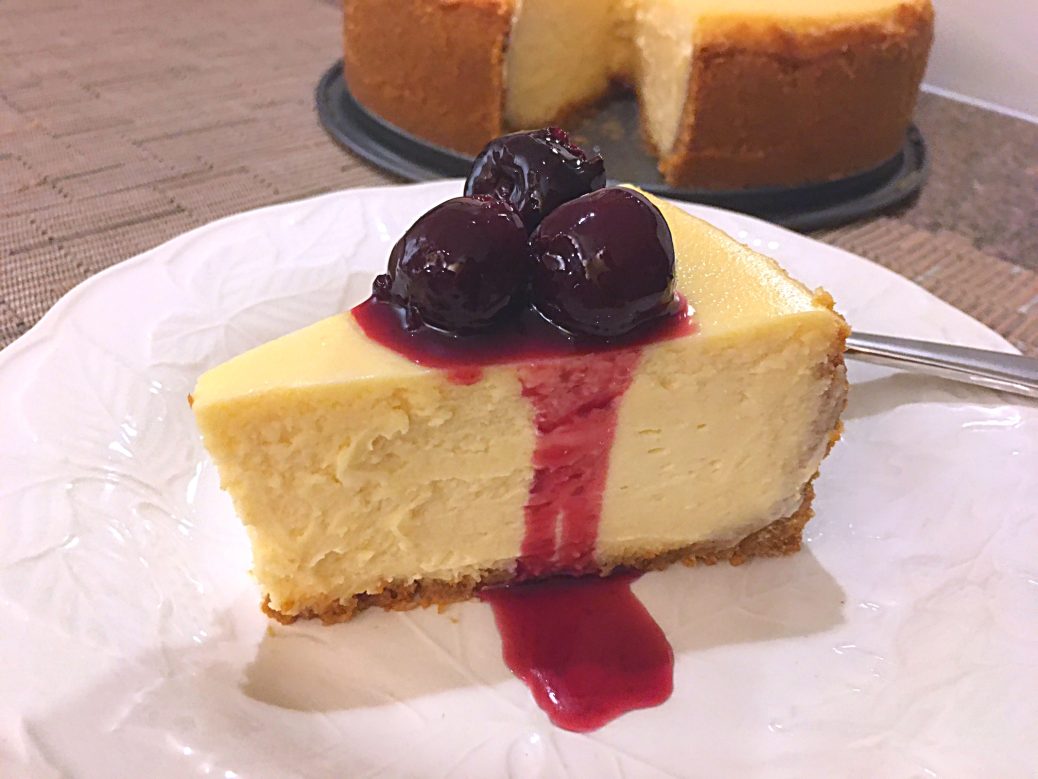
Another one I like to bake is my Creamy Cheesecake! My version is more towards the Chicago-style although I use the New York-style for my crust. It’s tall, light, moist, and creamy with a smooth texture! Rich with great flavor, this fool-proof dessert is perfect to serve throughout the year for any occasion 🥳…
There’s some time involved. It’s best to start 👩🍳 the day before serving it…
First the crust has to be made by combining graham cracker crumbs, sugar, salt, melted butter 🧈 and vanilla extract until the mixture resembles damp sand. After pouring it into a 9-inch non-stick springform pan, move the mixture towards the edges and as high as possible, pressing down firmly – don’t worry about the bottom, it’s an easy fix. To facilitate the task, use a flat bottom glass or a measuring cup. After it’s done, bake for 7 minutes or until the edges just start getting golden.
After the buttery graham cracker crust is made and quickly baked in the oven, the next step is the filling…
To incorporate it easier, all the ingredients have to be at room temperature which will prevent the texture from getting lumpy as well as overmixing. The cream cheese is mostly the problem. After sitting on the counter for hours, many times, it still firm so here’s a great trick to soften it quickly 😉… How to Soften Cream Cheese Quickly
Again, when all the ingredients are at room temperature, with the paddle attachment on medium speed, the cheese is creamed until smooth before incorporating sugar, salt 🧂, full fat sour cream, and vanilla extract.
When making cakes, always use full fat sour cream – don’t go light. It’s not the dessert to be on a diet! Sour cream gives better results than using milk 🥛. The reason is because the higher fat content and acidity ends up making a moister and richer cake. It also gives a nice tangy flavor… yum!
The most important thing in this whole process is to stop the appliance frequently and clean 🥄 the sides of the bowl especially scraping the bottom where small lumps can be hiding – we want the texture of our Creamy Cheesecake as flawless as it can be!
While the appliance is running, add one egg 🥚 at a time mixing well between each addition – don’t forget to clean the sides and scrape down the bottom of the bowl for a smooth lump-free texture. Another “tip” about making this cake is to “NOT RUSH” anything… take your time, that’s all I have to say!
When the filling is done, pour it into the prepared cooled crust and gently tap it on the counter to dislodge any trapped bubbles. Place it on a baking sheet – it’s easier to handle – and bake for 10 minutes at 350ºF then reduce to 300ºF and continue baking for another 50 to 60 minutes ⏰ or until the edges are puffed. Turn off the temperature and leave the cake, undisturbed, in the oven with the door closed for 1 hour.
After the cooling time is done, remove from the oven and let it cool at room temperature for another hour ⌚. During the coldest month of the year, my kitchen is far from being warm so to no shock the cake after it has cooled for one hour in the oven, I open the door slightly ajar and let it sit for another 30 minutes before transferring to the counter at room temperature for another 60 minutes.
Here are a few tips to make the perfect flawless Creamy Cheesecake…
• Bring all your ingredients to room temperature.
• Don’t overmix otherwise too much air gets into the batter leading to the cake over rising and cracking as it deflates – stop mixing when just incorporated.
• Clean the sides of the bowl as well as scraping down the bottom for a lump-free texture.
• Don’t rush it.
• After pouring in the prepared crust, gently tap the cheesecake on the counter to dislodge any trapped air bubbles.
• Don’t open the door to peek because the cold air 🌀 will enter the oven while the hot air escapes causing the cake to fall and/or crack
• After the baking time is done, turn off the heat and leave the cake in the oven for an hour to let it cool gradually.
• During the cold months, after it has been sitting in the oven to cool off, open the door ajar and give it another 30 minutes to adjust.
• Allow the cake to cool completely at room temperature before transferring to the refrigerator.
• In case there are some slight imperfections on the surface, simply spoon some toppings on to cover it – you’re allowed and the cake police 🍰👮♂️ won’t punish you for doing that!
This scrumptious Creamy Cheesecake will last 4 days when covered with plastic wrap or a lid and refrigerated. Wrap in multiple layers of cling film then foil and freeze the entire cake or leftovers (leftovers… how can that be possible!) for up to 2 months 📆. Thaw the cake or leftovers overnight in the fridge.
With no water bath 💧 involved, this fool-proof Creamy Cheesecake is the best there is! With all the tips I give on the blog/video, the cake will come out perfect every time without any cracks forming on top. This crowd pleaser has to be on your menu next time you’re entertaining… trust me, everyone will rave about it!
Bon Appétit!🍽
Check out these other cheesecake recipes: Pecan Caramel Cheesecake and Pumpkin Cheesecake with Biscoff Crust.
Here are several scrumptious dessert recipes for you to enjoy…😀
– Lemon Posset
– Maple Walnut Cake
– Cream Cheese Carrot Cake
– Bumbleberry Pie
– Black Forest Cake
– Poached Pears with Caramel Sauce
– Christmas Stollen
– Bananas Foster
– Lemon Meringue Pie
and for even more dessert recipes 🍰🍩, click on this link… Recipe Category • Dessert
Don’t forget to subscribe to our YouTube channel 📽 by clicking on this link… Club Foody YouTube

Creamy Cheesecake
Hover to scale
Ingredients
CRUST
- 1 3/4 cups Graham Cracker crumbs
- 1/4 cup granulated sugar
- 1 small pinch ground sea salt
- 5 tbsp. unsalted butter, melted tips & tricks
- 1/2 tsp. pure vanilla extract
FILLING
- 4 packages (8 oz. each) cream cheese, room temperature tips & tricks
- 1 1/3 cups granulated sugar
- 1/4 tsp. ground sea salt
- 3/4 cup full fat sour cream, room temperature
- 2 tsp. pure vanilla extract
- 5 large free-run eggs, room temperature
FRUIT TOPPING
- 5 ounces frozen black cherries
- 1 1/2 tbsp. granulated sugar
- 1/2 tbsp. limoncello liqueur see Recipe
- 1/2 tsp. cornstarch (mixed with 2 tbsp. cold water)
Directions
CRUST
- Preheat oven to 350ºF.
- In the bowl of a food processor, add crumbs, sugar and salt; process until blended.
- With the appliance running, slowly pour in melted butter and vanilla extract through the feed tube – the texture should be like damp sand.
- Pour into a 9-inch non-stick springform pan. Press the crumbs firmly into the bottom and up the sides as high as possible using the bottom of a measuring cup or glass.
- Carefully transfer the springform pan to the preheated oven and bake for 7 minutes.
- Remove from the heat, place the springform on a rack; set aside to cool while making the filling.
FILLING
- In the bowl of a stand mixer with the paddle attachment, add cream cheese and process on medium speed until creamy and smooth, about 1 minute; clean the sides and bottom of the bowl.
- While the appliance is running, slowly add sugar and mix well; stop to clean the sides and bottom of the bowl.
- Add salt, sour cream and vanilla. Process until the mixture is well combined and smooth, cleaning the sides and the bottom of the bowl a few times as well as the paddle attachment.
- Add the eggs, one at a time, mixing well between each addition and scraping down the bowl.
- Pour the batter into the prepared cooled crust and transfer to the 350ºF preheated oven; bake for 10 minutes
- Reduce the heat to 300ºF and continue baking for an additional 50 to 60 minutes or until the edges are slightly puffed.
- Turn off the oven and leave the cheesecake in with the door closed for 1 hour.
- Remove the cheesecake from the oven and let it cool for 1 hour. While warm, run a thin knife around the outside to help release the cake from the pan later.
- Transfer it to the fridge for at least 8 hours but preferably overnight.
- When ready to serve, gently remove the sides and run a knife under the bottom to release the cake from the base; carefully transfer to a cake server.
FRUIT TOPPING
- In a small saucepan over medium heat, add fruit and sugar; stir well to coat.
- Add Limoncello liqueur, stir and set the timer for 5 minutes or until the fruits are just tender.
- Increase the heat slightly and when simmering, add cornstarch mixture; stir until it thickens.
- Transfer fruit mixture to a bowl and let it cool off a little before covering and transferring to the fridge until ready to serve.
Don't forget to rate and comment on this recipe!
Creamy, smooth and absolutely delicious! This cheesecake was amazing. Next, I’m trying your Pumpkin Cheesecake.
That’s great, thank you Bill 😊. I’m sure you’ll love the Pumpkin Cheesecake with Biscoff Crust… it’s awesome as well! Have a fantastic day.
Mine cracked. She didn’t admit it, but I think my daughter opened the door. Anyway, it was still scrumptious. Everyone loved it.
That will definitely do it. As soon as the cold air 🌀 enters the oven, the hot air will escape causing the cake to fall and/or crack due to the sudden temperature change. Happy you enjoyed the recipe. Have a wonderful day, Linda🌞.
How many times the top of my cheesecakes cracked – a zillion times! I followed the directions to a “T,” and I couldn’t believe it! There were no cracks at all!!! From now on, this is the way I’ll be baking my cheesecakes.
This was delectable, thank you Frankie.
You’re very welcome, Jill 😉. Have a lovely day.
I made this dessert countless times, and the top never cracks. You’re a lifesaver!
Aww, thank you Abigail 🙏.
Your method takes time but the end result is as if it came straight from the bakery. Will you make another cheesecake recipe with flavors? I just subscribed.
Welcome to the Club, Mae 😀. Yes, I will. Fall, next year, I’ll be posting my Pumpkin Cheesecake with Biscoff Crust and at the beginning of 2026, there will be my Pecan Caramel Cheesecake as well as No Bake Strawberry Cheesecake 🍓 during summer 2026. Have a beautiful day 🌞.
This is probably the creamiest cheesecake I have ever made! Thank, you, thank you, thank you!
You’re very welcome, Paula 😉.
I tried your method without the water bath and it worked like a charm!
It takes a little more time but the results are perfect! Have a fabulous day, Rosie 🌞.
I served this cake for Thanksgiving and everyone raved about it. Thank you for posting.
It’s my pleasure, Liza 😀. I’m happy everyone loved it. Enjoy your day.
Mine deflated! I really don’t know what I did wrong. Did I overmix/undermix?
Sorry to hear about that. If you overmix, you incorporate more air into the batter, which will cause the cake to rise faster in the oven but also collapse. Undermixing the cake will lead to parts of it being over or undercooked. It won’t necessarily make your cake collapse but the results won’t be creamy. If you’re worried about overmixing, simply fold the last ingredients (eggs) with a spatula. I hope this helps.I hope it helps. Have a gorgeous day, Celeste 🌞.
Simply lovely with great results!!! 💗
the BEST!
Awww, thank you John 🙏!