


Pickled Ginger


Do you enjoy sushi or sashimi 🍣? What about tataki? If you do and like to order a few different kinds from your local Japanese restaurant then you certainly need an important Japanese condiment that will cleanse your palate between eating different types. It’s called “gari” also known as sushi ginger or Pickled Ginger!
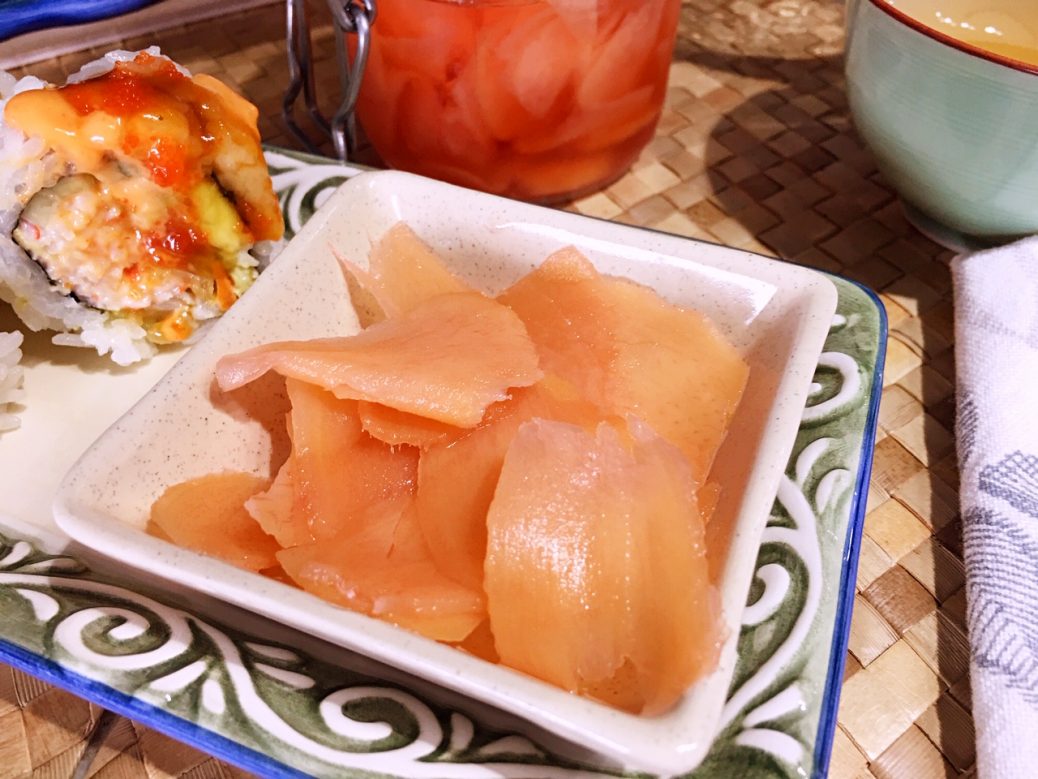
Technically “gari” is more of a pale yellow color versus pink unless you get your hands 🛒 on some young ginger that has pink shoots which will tint the pickles naturally. Using young ginger is preferable because the flesh is tender and the ginger is sweeter.
Unless you’re at the Asian supermarket at the right time, your chances of getting some young ginger is pretty slim. Do you stop making 👩🍳👨🍳 Pickled Ginger from scratch if you cannot find young ginger? Of course not but you might have to add a special ingredient.
When I make “gari” from scratch, I add an ingredient that will make my pickled ginger pink… radishes! I slice them as thin as my mature ginger and place them at the bottom of the jar. The secret is to leave them long enough to color and tint the ginger and then remove them so their flavor doesn’t sabotage the taste of the ginger. I’d say no longer than 12 hours 🕞…
It’s up to you to substitute food coloring for the radishes. You can still use a natural Food Coloring like the one in my video 🎥 that I presented a few months ago or go with the commercial variety. I personally don’t use the manufactured food coloring but you’re in charge of your own “gari”!
A couple more reasons why you should be making Pickled Ginger is you’ll be saving money 💰. Also, ginger has some anti-microbial properties which are great when eating raw food like sushi, sashimi or tataki. Next time you make or order at a Japanese restaurant 🎌, or decide to make my Asian Chicken Salad, Asian Cucumber Salmon Rolls or Tuna Tataki with Avocado Slaw, make this homemade condiment. It’s a super easy recipe that I’m sure you’ll love!
Bon Appétit! 🍽
Here are more delicious canning recipes for you to enjoy…😀
– Cocktail Onions
– Apricot Jam
– Easy Pickled Green Beans
– Bread & Butter Pickles
– Strawberry Jam with Orange Zest
– Classic Marinara Sauce
– Spicy Red Pepper Jelly
– Homemade Apple Sauce
– Sweet & Savory Homemade Ketchup
and for even more Asian inspired recipes 🥡, click on this link… Recipe Category • Asian Cuisine
Don’t forget to subscribe to our YouTube channel 📽 by clicking on this link… Club Foody YouTube
Pickled Ginger
Hover to scale
Ingredients
- 8 ounces (1/2 lb.) ginger, peeled Footnote
- 2 large radishes, washed and ends cut off
- 1 tsp. ground Himalayan pink salt
- 1 cup unseasoned rice vinegar
- 1/3 cup granulated sugar
Directions
- Using a mandolin, carefully slice the ginger and the radishes as thin as possible .
- Place radish slices in the jars and set aside.
- Transfer the sliced ginger to a pot of boiling water and process for 7 to 8 minutes.
- Remove from the heat and drain the ginger slices well before sprinkling with salt; let them sit for 30 minutes in the colander.
- Transfer them to a cutting board and dry the slices with paper towels before adding them to the jars with radishes; set aside.
- In a small pot over medium heat, combine rice vinegar with granulated sugar; stir until the sugar is dissolved.
- Increase the heat to medium-high and bring the vinegar mixture to a boil. Immediately pour it over the ginger slices in the prepared jars.
- Let the jars cool, stirring occasionally without disturbing the radishes at the bottom.
- Close the lids and transfer to the fridge.
- About 8 to 12 hours later, remove the discolored radish slices from the jars and discard them.
- Transfer the jars back to the refrigerator until ready to serve. It keeps for up to 2 months.
Notes
Don't forget to rate and comment on this recipe!