


Sesame Snaps

Most of my life, I’ve always been quite active physically. It was only a few years ago that I stopped going to the gym and be more sedentary. Is it because of the huge amount of hours spent in front of my computer doing editing, writing, blogging, and so on? Although that’s probably the reason why, I won’t let it get to me. I need to get back into shape like I used to be all my life. I miss my firm little body and I won’t blame it on Club Foody. The only person at fault here is… MOI (me)!
I was at the gym almost every day since the 80s’ and if I wasn’t there, I was constantly moving and exercising. When it came to eating, I never had a weight problem until recently with my hormones going off the wall and my metabolism slowing down like a snail! Back then, I basically ate whatever I wanted without gaining an ounce. Was I a tofu-grain fanatic? Not really… I was eating from super healthy to normal but here’s the thing… I’ve never been a fan of fast food chains – their food grosses me out! When I was going to a health food store – I still enjoy going there -, I always loved to try new “stuff”. That is when I discovered the Sesame Snaps/snack, candy, take your pick! They became my favorite little sweet treat especially if I needed a quick sugar fix!
One afternoon after the gym, I stopped at the convenience store (yes, they were there as well) to buy my little sesame snaps, I decided that I should try and make them homemade… just for kicks! Well it was pretty tricky at first trying to figure out the amounts and making sure they would be crunchy instead of sticky and gluey! It took me a few tries but I eventually succeeded!
Back then, silicone mats didn’t exist so I was using parchment paper. Oh my! So many times, the sesame snap mixture glued to the paper and I had to throw everything in the garbage then restart all over again. Eventually I had a brain storm and greased the papers very, very well, quickly rolled out the mixture so it got pretty thin – the thinner it is, the crunchier it gets! – and voilà! I finally made my favorite homemade treats.
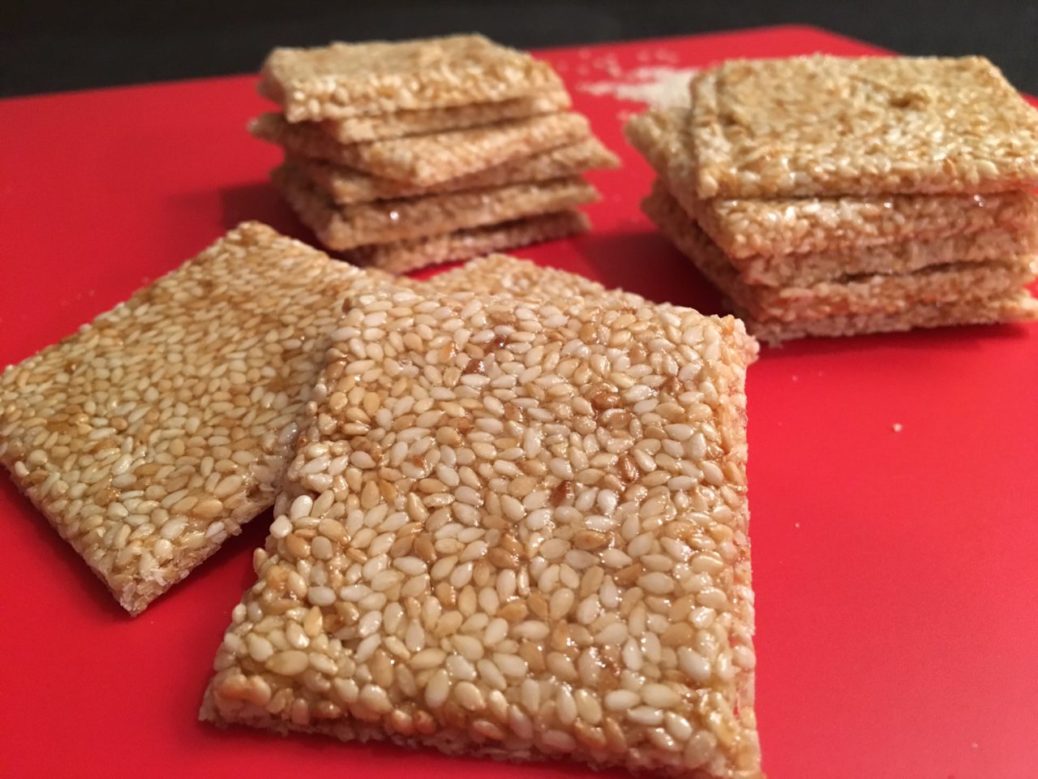
From start to finish, you can prepare them within ½ an hour – they’re a snap to make… lol! A light and tasty little treat with a satisfying crunch. Great in lunch boxes or to bring along for your activities or to enjoy as a mid-afternoon snack. If you decide to freeze some for later, place wax paper in between each square and place them in a re-sealable plastic freezer bag. Now with this recipe wherever you are, you and your family can enjoy these crispy, chewy little bites!
Bon Appétit!
Here are more amazing snack recipes for you to try…
– Energy Berry Bites
– Spicy Holiday Chocolate Bark
– Reese’s Peanut Butter Cups
– Grandma’s Crunchie Bars
– Powerhouse Cookies
– Bounty Chocolate Bites
and for even more snack recipes , click on this link… Recipe category • Snacks
Don’t forget to subscribe to our YouTube channel by clicking on this link… Club Foody YouTube
Sesame Snaps

Hover to scale
Ingredients
- 1 cup sesame seeds
- 1/2 cup granulated sugar
- 2 tbsp. honey tips & tricks
- 1 pinch ground Himalayan sea salt
Directions
- In a medium skillet over medium heat, add sesame seeds and toast until lightly brown, about 5 minutes. Transfer to a bowl and set aside.
- In a medium saucepan over medium heat, combine sugar, honey and sea salt. Stir constantly until the sugar is dissolved, about 3 minutes.
- Bring the mixture to a gentle boil and cook for 2-3 minutes or until the color turns amber.
- Add toasted sesame seeds and quickly stir until well blended.
- Rapidly remove from the heat and dump the mixture onto a silicone mat.
- Spread mixture using a greased angled spatula, and place another silicone mat on top.
- Roll down to a thin layer (the thinner it is, the crunchier it gets) with a rolling pin.
- Gently peel off the silicone mat and score with a greased knife into 2-inch square (you might have to re-score a few times as it gets harder).
Don't forget to rate and comment on this recipe!
Now THIS is a good sesame snaps recipe. Just a few natural ingredients and very straightforward, just as snaps should be! I also have to say, first time on the site and I love it…appreciate how there is no tons of empty rambling before the recipe. Just cutting to the chase with true useful info on making the snaps, and the recipe itself. Plus the awesome “reading mode” which I noticed by accident! Five stars and will definitely check out your other recipes on the site.
Thank you so much for your kind comments and for stopping by. I can’t stand going on a website and having to close a “zillion” ads… very frustrating. By the way, every Tuesday & Thursday, I post new recipes including a monthly kitchen tips & tricks. Come and join the Club for FREE! Have a wonderful day JP ☺